
YOUR FIRST JOURNEY
A little guidance.
A lot of possibility.
From your first destination to finding your way back to your stay. Follow the steps in order, or jump to the part you need.
Screens show example trips. Labels and available tools may differ by platform and app version. iPhone is coming soon.
01 / Trips → create a trip
Start with your trip
- Open Trips and choose the + button to create a trip.
- Choose the destination, then use Continue to move through the destination, dates and review steps. Check the cities, nights, transport and Solo or Group choice.
- On the review step, choose Create Trip. Open the saved trip from Trips and confirm the date range.
Check before moving on Check the destination and date range on the saved trip. To correct them, open Edit Trip and save your changes.
Next step ↓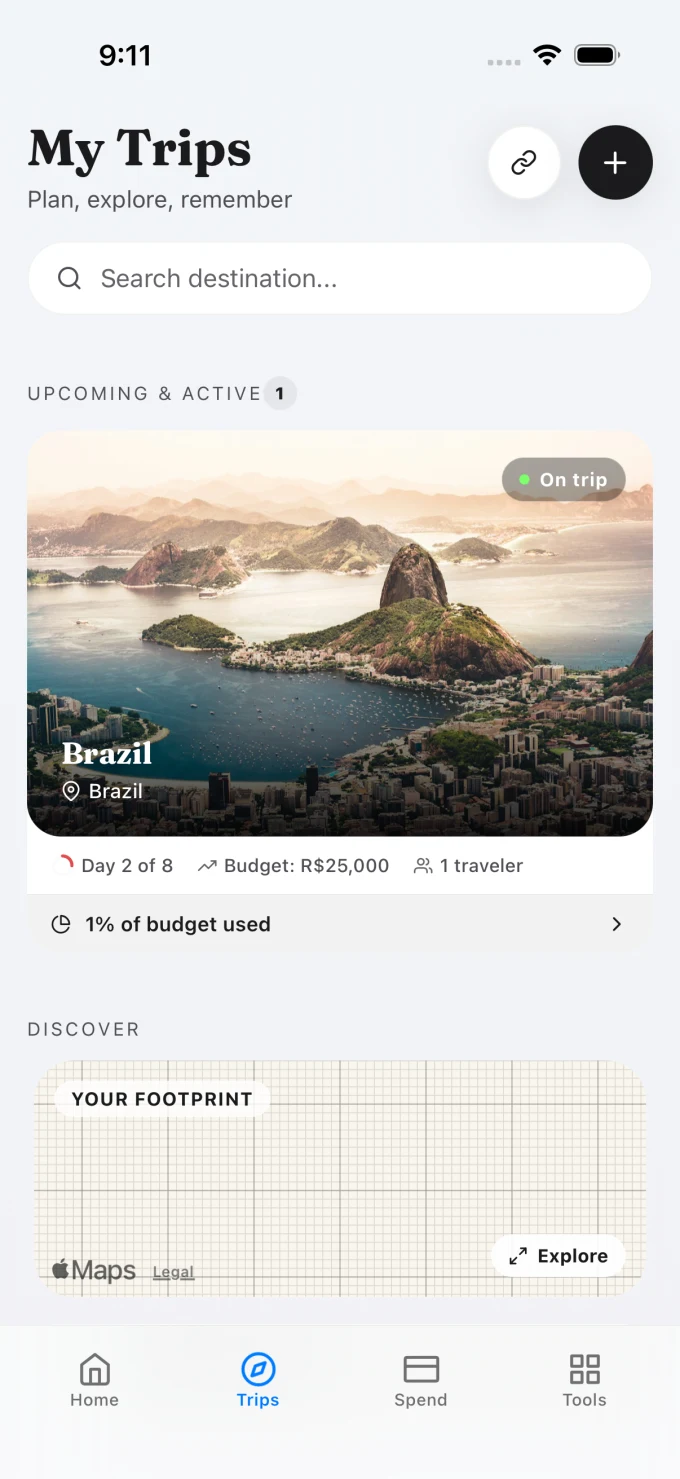 Open full-size screenshot ↗
02 / Trips → your trip → itinerary
Give each day a little shape
- Open the trip’s itinerary and select the day you want to plan.
- Use the add control to open New stop. Search for a place or enter the details yourself. Check the city, date and time.
- Choose Add. Reopen the saved stop to review its details; use Edit stop and Save when correcting it.
Check before moving on The stop should appear on the intended day. Adding it to an itinerary does not make a reservation.
Next step ↓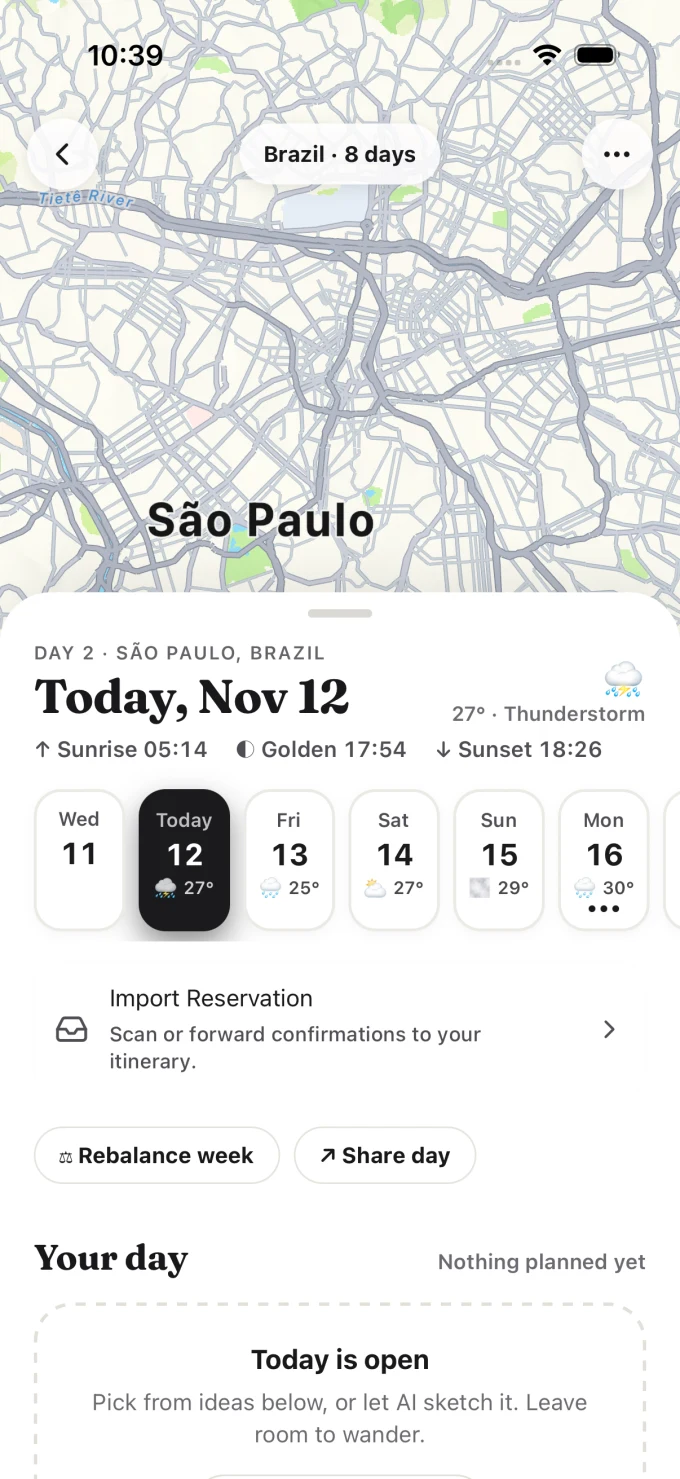 Open full-size screenshot ↗
03 / Your trip → Your stay
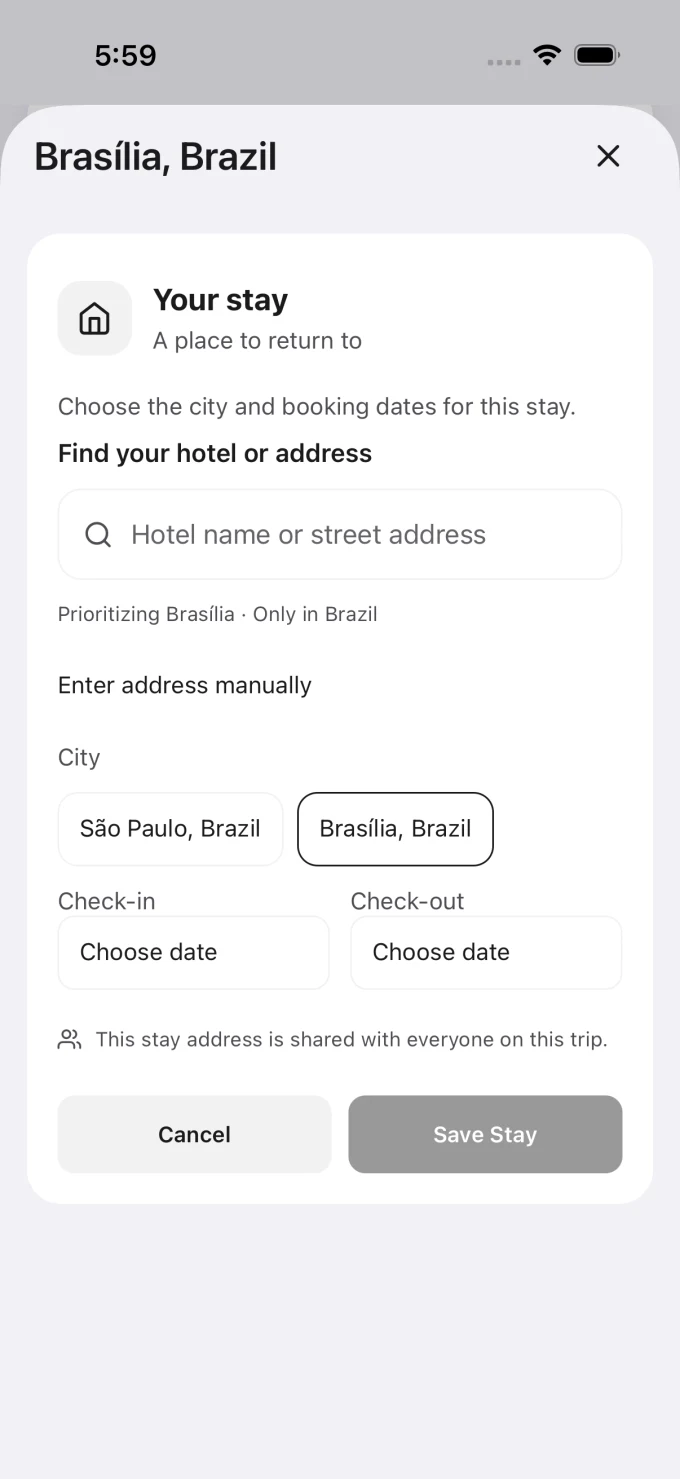
Save a place to return to
- Open Your stay in the trip and select the city the address belongs to.
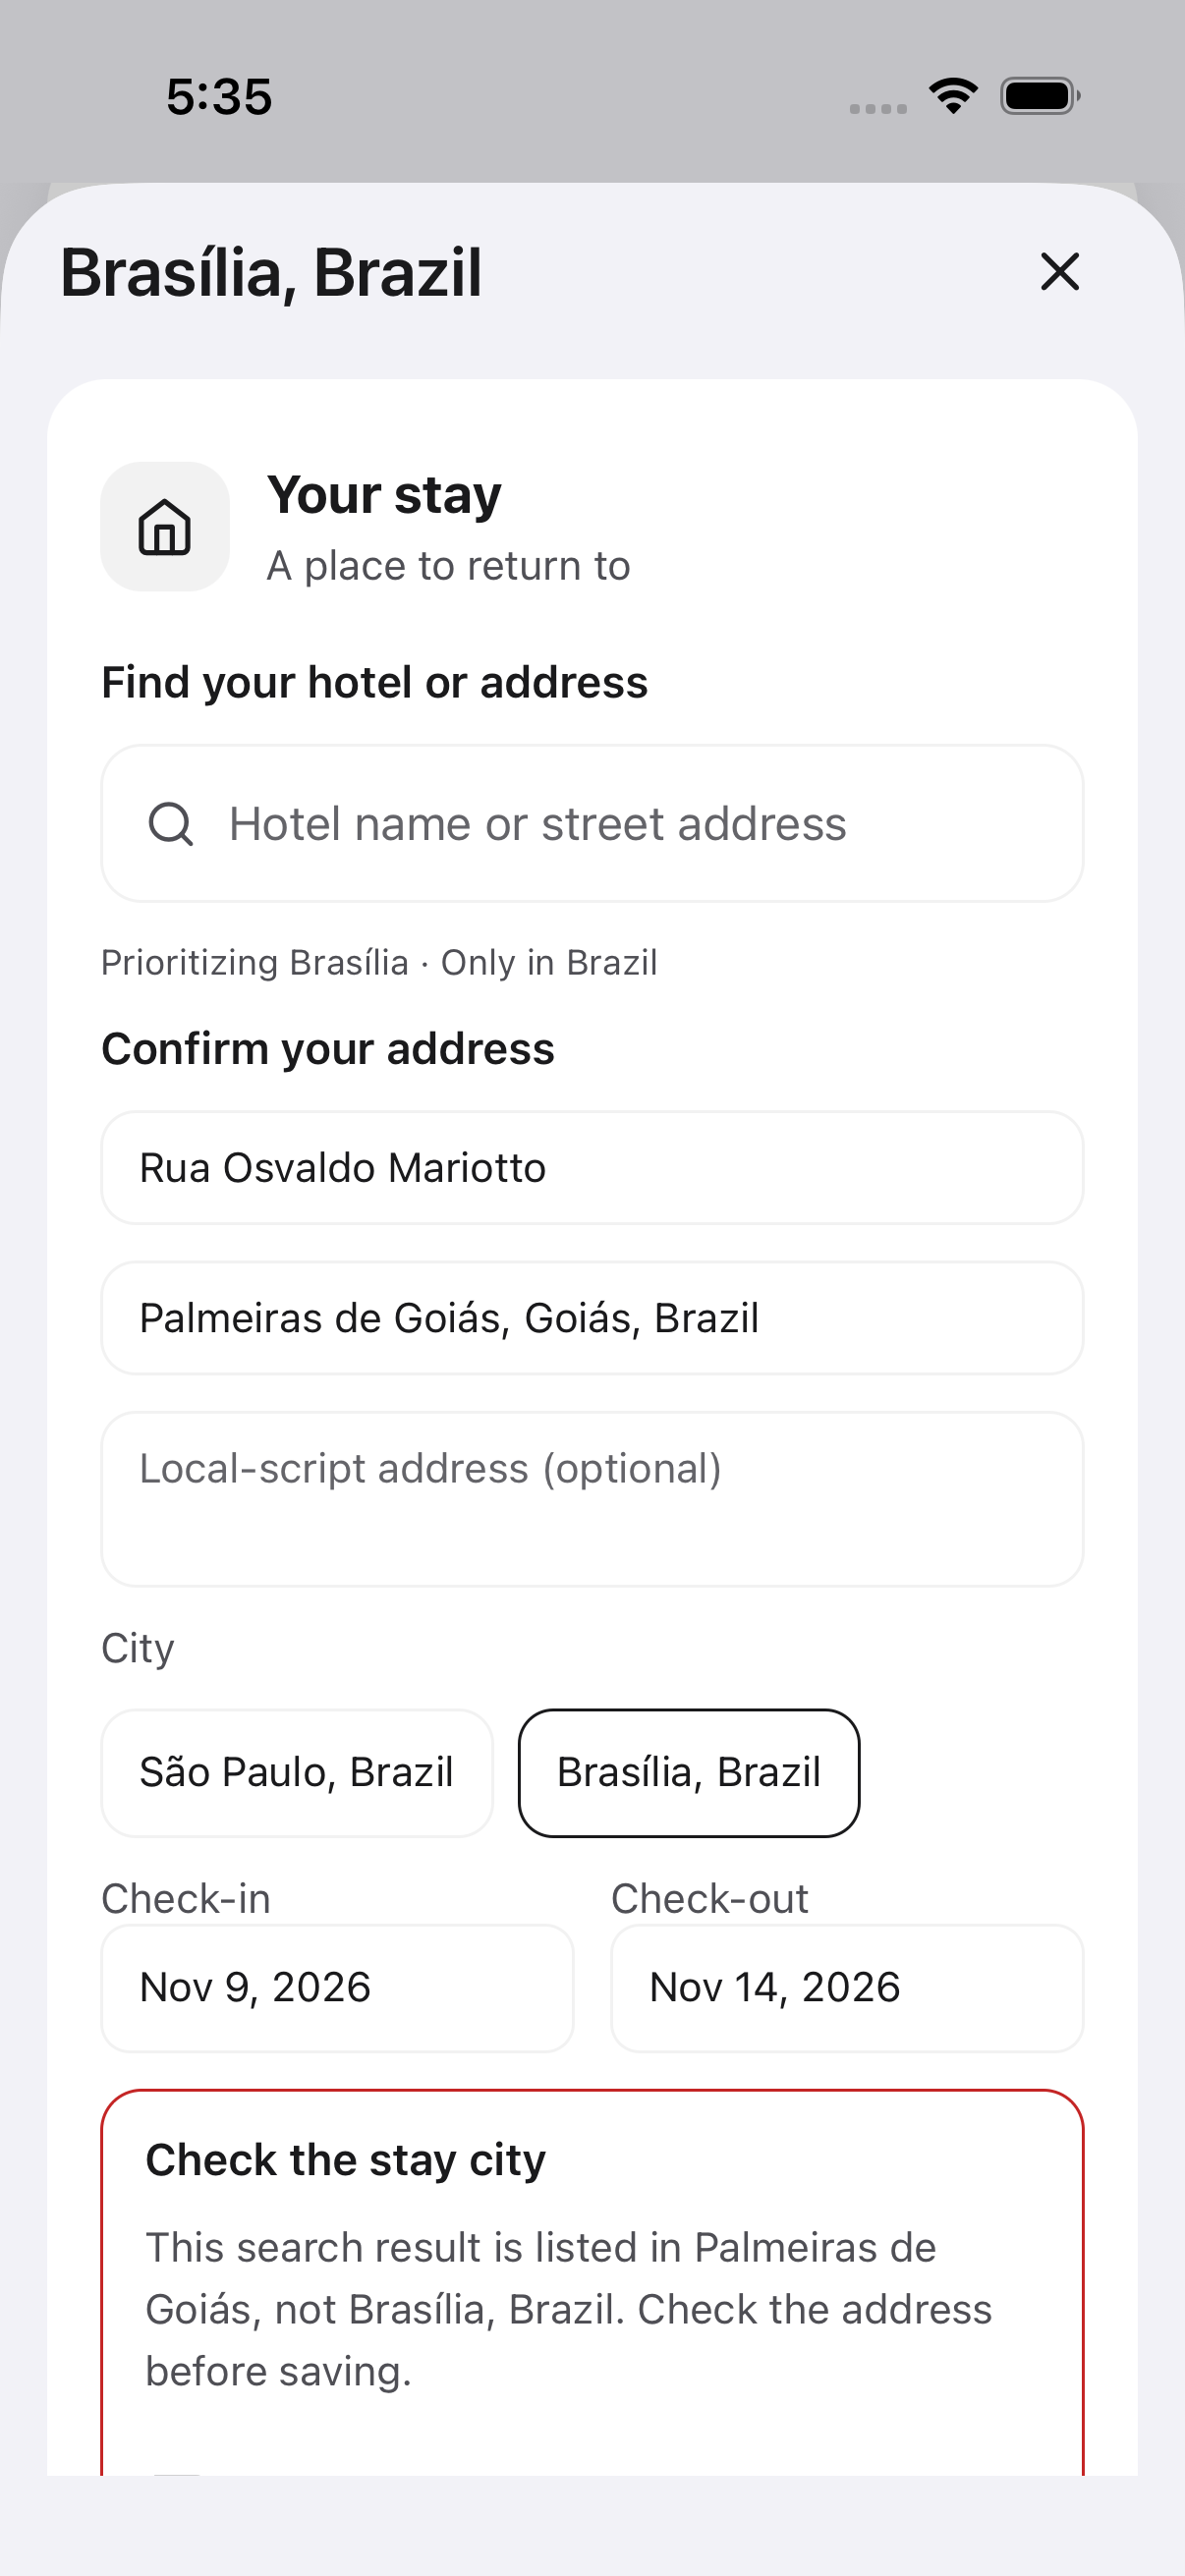
- Search for the hotel or enter the address manually. Check the full address, check-in and check-out dates, and any different-city warning.
- Save the stay, then reopen it. Use the stay management controls to change it or add another stay for different dates.
Check before moving on Check that the address belongs to the intended city before using Show to driver. Saving an address does not book accommodation.
Next step ↓See the real different-city warning
This captured result is in a different city from the selected stay. Return to search or correct the address before saving. Do not treat it as a recommended stay.
 Open full-size screenshot ↗
 Open full-size screenshot ↗
04 / Tools → visa and travel preparation
Get ready before you leave
- Open Tools and choose Visa documents for the trip. Review the traveller and destination details used by the guidance.
- Work through the relevant preparation sections. Complete missing details before generating supporting drafts.
- Review every name, date and statement in a draft before exporting or using it. Confirm requirements with the official authority.
Check before moving on An exported draft is a supporting document, not a visa application submission or approval.
Next step ↓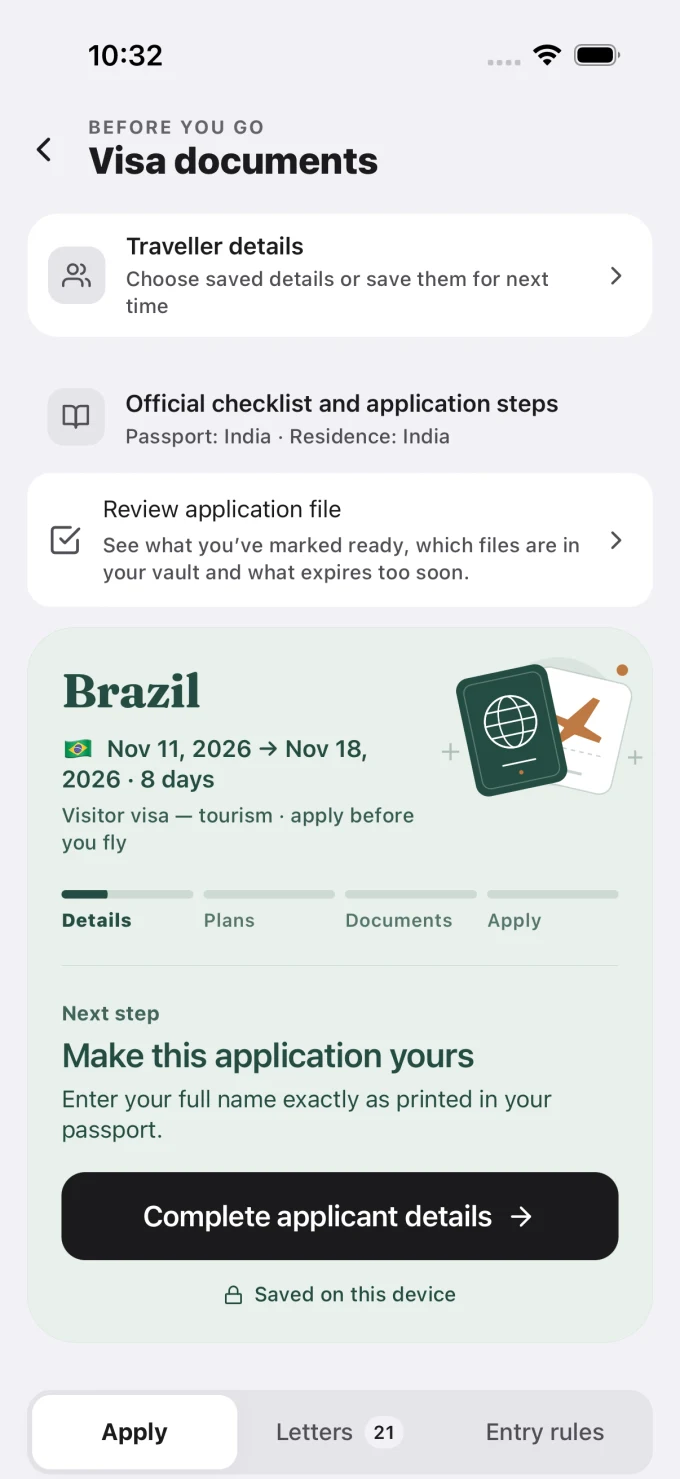 Open full-size screenshot ↗
05 / Tools → Offline Kit / Trip Kit
Prepare for less signal
- While connected, open Offline Kit for the trip and choose Download trip kit, or Refresh kit when offered.
- Wait for the preparation to finish and review each component’s status. A partially ready kit is not a complete download.
- Enable airplane mode and reopen the kit. Check your itinerary and saved stay address, then restore your connection.
- After editing the trip, refresh the kit while connected and check it again.
Check before moving on Only rely on content you actually reopened offline. Live search, weather updates and syncing still need a connection.
Next step ↓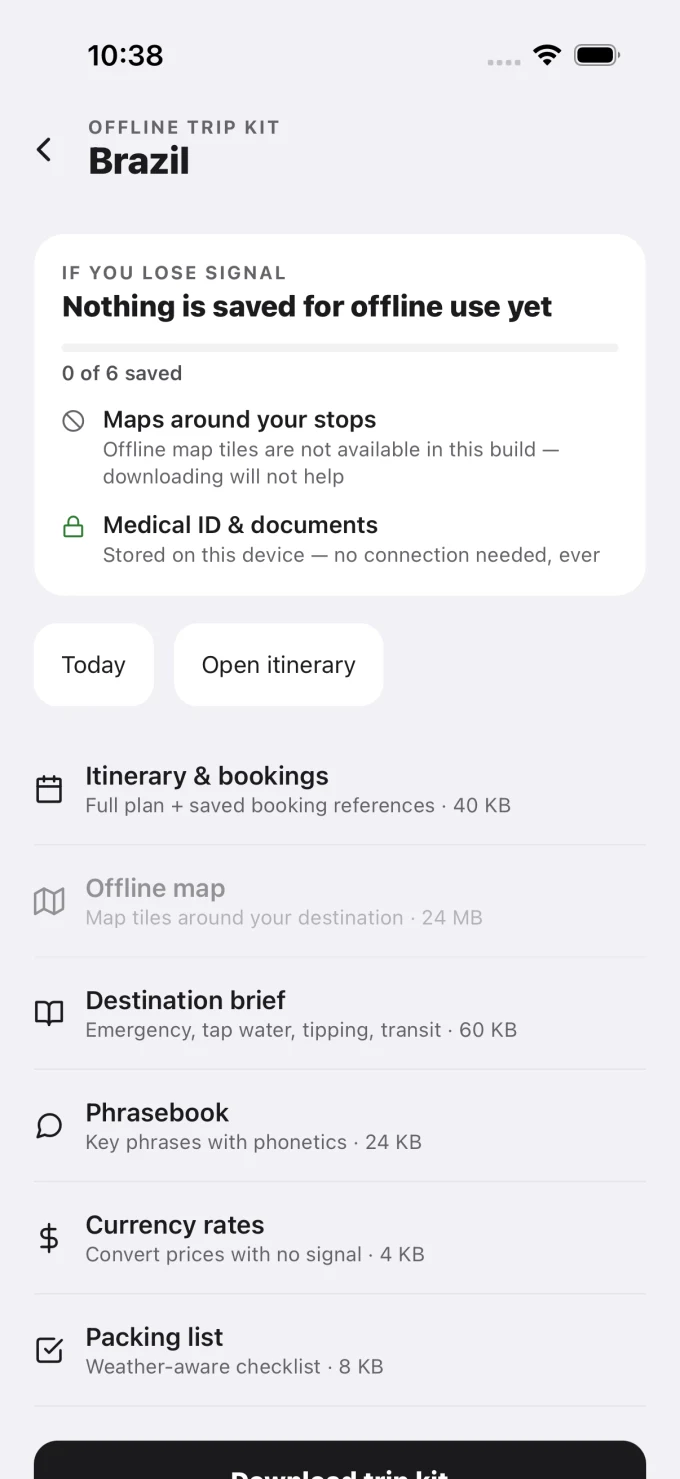 Open full-size screenshot ↗
06 / Spend → select your trip → add expense
Keep travel money together
- Open Spend, select the trip and choose the add-expense control.
- Enter the amount, original currency and category. For group costs, check who paid and who participates in the split.
- Review and save. Reopen the expense to check the amount and people; edit the record if something is wrong.
- When money has been paid outside Vihaar, record the settlement and review the updated balance.
Check before moving on Converted totals are approximate. Recording a settlement does not transfer money.
Next step ↓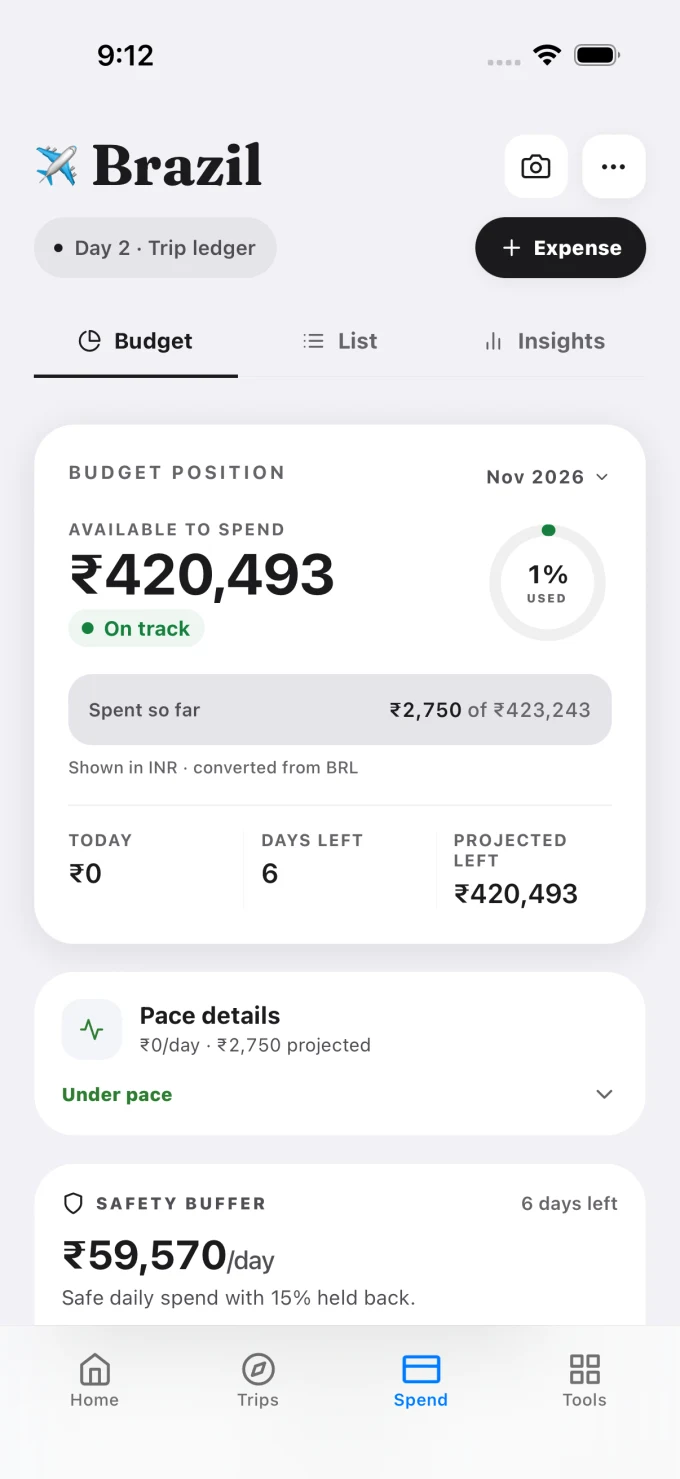 Open full-size screenshot ↗
07 / Home → your current trip
Find what you need on the day
- Open Home and check which trip and city are active for the date.
- Open the itinerary to review today’s saved plans. Use Your stay when you need the saved address.
- Open Tools for the utility you need and check its destination and inputs before using the result.
Check before moving on Live context can be unavailable offline. A missing weather or search result does not mean your saved itinerary has disappeared.
You’re ready ↓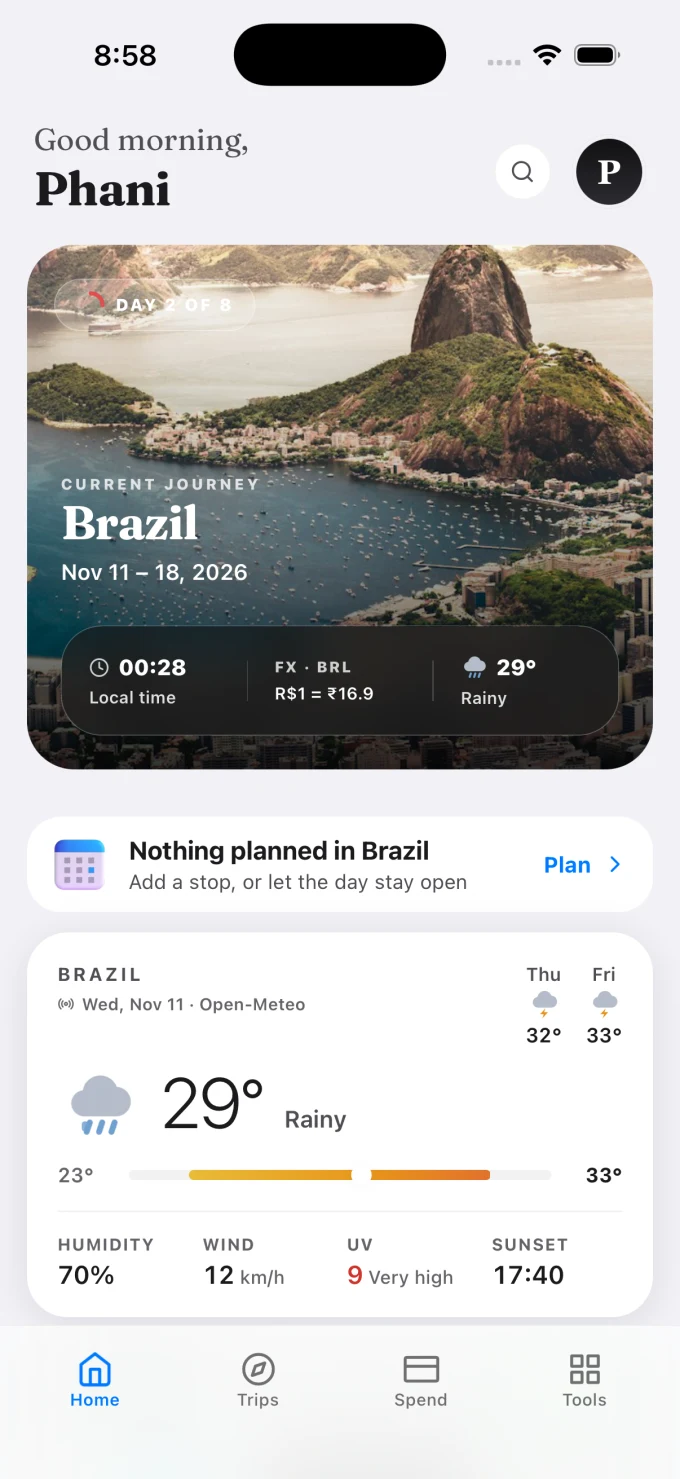 Open full-size screenshot ↗
HELP WITH A SPECIFIC TASK
The details, when you need them.
These instructions describe app flows. Screenshots above show the existing app screens, not every button or intermediate step.
Invite your people
- Create or edit the trip as Group, then open its invitation controls. The sheet is titled Invite travelers.
- Tap the invite code to copy it, or choose Share invite to open your device’s share sheet. Send it only to the people you intend to invite.
- If Include a trip preview is selected, anyone with that link can see the destination, dates and up to three selected stops. Review that choice before sharing.
- Ask the recipient to sign in and join using the invitation or Trips → Join a trip. Check the membership list after they join.
- An invitation adds a collaborator to your trip. A public guide shares a readable plan and creates a separate copy when imported.
Check a group expense split
- In the expense editor, enable Split this expense for a shared cost.
- Choose Adjust to review PAID BY and SPLIT WITH. Select only the people sharing this cost.
- Choose Equally for an even split, or use custom amounts, percentages or weighted shares. Check that the full amount is allocated.
- Review the payer, participants and each share before saving. Reopen the expense to verify the saved record.
- Use Record a settlement only for a payment made separately. Check sender and recipient; recording it does not move money.
Keep private documents separate
- Open Tools → Document Vault. Add only the private files you need and use device authentication when prompted.
- Open a saved file to check it is readable. Keep an independent copy of essential documents.
- Vault files are device-local and separate from the group trip. Signing out removes private vault data from this device.
Work through readiness and packing
- Open the trip’s preparation tools and review passport, visa, booking and packing tasks.
- Mark a task complete only after checking the actual document or item. Revisit the checklist when destinations or dates change.
Review a reservation import
- Open your trip’s Overview and choose Import a reservation in the flights section. Supply supported booking text or an image. Read any AI data-sharing prompt before proceeding.
- Review the extracted city, date, time and reservation details. Correct mistakes before adding them to your itinerary.
- If the booking is not recognised, add a stop manually. Importing details does not create or change a reservation with the provider.
Use a travel tool with the right context
- Open Tools and select the relevant trip and destination. Tool visibility can depend on release settings and your preferences.
- For Grid & Socket Advisor, open your trip → Checklist → Packing → Grid & Socket Advisor. Check the device input label as well as the actual outlet. A plug adapter does not convert voltage.
- For safety information, verify the country and available source. Vihaar is not an emergency service.
- For disruption, lounge, card or jet-lag guidance, check inputs and coverage. Confirm live operating conditions or provider terms before acting.
Control language, reminders and sharing
- Open Profile to review language, notification and optional feature preferences.
- Check OS notification permission if reminders do not appear. Device settings can suppress delivery.
- Review AI Data Sharing separately from microphone or camera permission. Withdrawing consent stops future AI requests; it does not retract data already sent.
READY WHEN YOU ARE
Make it your journey.
Start with one trip. You can come back and fill in the details.
Get Vihaar ↗ Need a hand? Contact support ↗